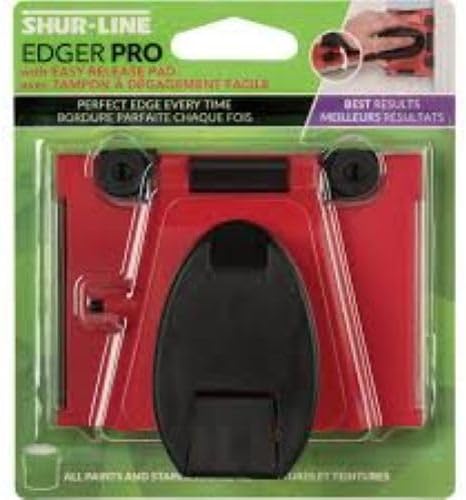
You’ve already rolled your walls. The color is right, the coverage is solid, and now you’re standing at the intersection of ceiling and wall with a loaded brush — knowing that the next ten minutes will determine whether this whole room looks finished or amateurish. Painter’s tape seems like the safe bet, but you’ve been burned before: it bleeds, it lifts dried paint when you peel it, and taping a full room adds an hour of prep before you even open a can. A paint edger — a handheld tool with a flat pad and a built-in guide wheel that rides along trim, ceilings, and baseboards to deposit paint in a controlled line — promises to skip the tape entirely. Some of them mostly deliver on that promise. Some of them are $8 gadgets that will end your evening in frustration.
This guide cuts through the noise. You’re past the “just use tape” phase and wondering whether edgers are a legitimate trade-up or a gimmick. The answer is: the right edger, used correctly, is faster and cleaner than tape for most straight-edge situations. The wrong one — or the right one used at the wrong speed, with the wrong paint consistency — will feather and smear. Here’s how to tell the difference and pick what actually works for your next project.
| EDITOR'S PICK[VOOMEY Paint Edger Tool Kit](https://www.amazon.com/dp/B0D97PKSPN?tag=greenflower20-20) | Mid-tierShur-Line 2006561 Paint Edger P… | Budget pickPainter's Trim Guard 12 Inch Pa… | |
|---|---|---|---|
| Size | 9" | — | 12" |
| Kit includes | 7 pieces | 2 refills | — |
| Rotating head | ✓ | — | — |
| Pad refills | ✓ | ✓ | ✗ |
| For corners | ✓ | — | — |
| Price | $22.99 | $13.99 | $5.99 |
| See on Amazon → | See on Amazon → | See on Amazon → |
Why Tape Keeps Losing and Edgers Keep Getting Better
Painter’s tape has one fundamental flaw: it’s passive. It blocks paint, but it doesn’t apply it. That means every line you tape is actually two operations — masking and painting — and the mask itself introduces failure points. The Architectural Digest roundup of professional painter advice consistently notes that working painters prefer cutting in freehand or with mechanical guides over tape for straight runs of 10 feet or more, reserving tape for genuinely complex intersections like window muntins or decorative molding profiles.
Edger pads solve the core problem differently: they apply and guide simultaneously. The pad — typically a dense foam or microfiber rectangle — holds paint. The guide wheel (or rigid edge guide on cheaper models) rides along the adjacent surface without touching it, maintaining a consistent offset. The result, when the tool is loaded correctly, is a 1.5–2-inch band of color that terminates cleanly at the junction.
The evolution matters for buyers. Early-generation edgers from the 1990s had fixed-foam pads that absorbed inconsistently and guide wheels that left paint dots on ceilings. Current-generation options from Shur-Line, Accubrush, and Warner solve both problems with replaceable microfiber pad heads and spring-tensioned guide wheels. Reviewers at Bob Vila’s 2025 edger roundup note that the jump from $10 fixed-pad tools to $25–$40 replaceable-head models is the single most impactful upgrade in this category — more so than any feature after that price point.
The Edger Landscape: Three Tiers Worth Knowing
Tier 1 — Fixed-Foam Pad ($8–$15)
These are the tools hanging in plastic blister packs at every home center. They work for one job: a single room, single session. The foam pad saturates unevenly, and because it’s not replaceable, dried paint from session two onward compromises the edge quality. The guide wheels on this tier tend to be plastic with no spring tension, meaning they drag or chatter on textured ceilings.
When to use it: A renter doing one accent wall who won’t paint again for two years. If you’re reading this article, you’ve probably already outgrown this tier.
Tier 2 — Replaceable-Head Edger ($22–$45)
This is where the real decision lives. The two names that come up most consistently in aggregated owner reviews are the Shur-Line 1000C and the Accubrush XT. Both use microfiber pad heads that can be swapped out between colors or when the pile compresses. Both have guide wheels with enough float to handle slight ceiling texture.
The tradeoff between them is worth naming directly:
- The Shur-Line 1000C loads faster and holds more paint per pass, which owners report translates to fewer interruptions on long runs. The pad geometry is wider (roughly 2.5 inches), so it deposits a broader band — useful if you’re edging and not planning to roll to within 2 inches of the ceiling anyway.
- The Accubrush XT has a narrower pad and a more refined guide-wheel tension system. Reviewers at The Spruce’s edger overview note it handles textured ceilings better than the Shur-Line because the wheel compresses into high spots instead of riding over them and dropping the pad. The tradeoff: it holds less paint and requires more frequent reloading.
For a whole-room or whole-home project — the kind where you’re specifying Sherwin-Williams Emerald or Benjamin Moore Regal Select and want the finish to match the paint quality — the Accubrush XT is the more controlled tool. For a fast single-color repaint where speed matters more than surgical precision, the Shur-Line 1000C is faster and costs less to maintain in replacement heads.
Tier 3 — Pro-Grade and Specialty ($50–$90+)
This tier includes the Hyde Tools Pro edger and the Wooster Prep edger, both of which are specified more often by professional painters than by DIYers. The differentiation here is build quality over long commercial runs — the guide-wheel assemblies are metal rather than plastic, the handles are ergonomically designed for repetitive use, and the replacement pad systems are more durable.
For a design-forward homeowner or interior designer supervising their own application of Farrow & Ball or Fine Paints of Europe product, the investment logic is real: a $70 tool that delivers consistent lines across 12 rooms over two weeks is cheaper than redoing edges. That said, at this tier you’re also close to the skill level where freehand cutting-in (with a quality angled sash brush like a Purdy Clearcut or Wooster Silver Tip) becomes competitive — which leads to the tradeoff discussion below.
Edger vs. Freehand Cut-In: Naming the Real Tradeoff
The most honest thing this category guide can do is tell you that experienced painters, per the This Old House explainer on cutting in without tape, mostly prefer a good angled brush over any edger for corners and curved profiles. The brush is more adaptable. A quality 2.5-inch angled sash brush loaded correctly will follow crown molding, door casing returns, and outlet plates in ways no pad tool can.
Where edgers win:
- Long, uninterrupted ceiling-to-wall runs in rooms with flat or lightly textured ceilings
- Baseboards with consistent height and no floor variation
- Accent walls with a straight color break against a neutral wall
- Painters who are intermediate skill level (your brush control is good but not automatic)
Where brushes win:
- Rooms with architectural complexity — crown molding, raised panel wainscoting, arched openings
- Trim work and window surrounds
- Any situation where the adjacent surface is irregular or unpainted
- Painters who cut in regularly and have built muscle memory
The practical answer for most intermediate DIY renovators is: edger for the ceiling-to-wall junction, brush for everything else. That hybrid approach is what Apartment Therapy’s painting tools roundup consistently comes back to — no single tool owns the whole job.
By the Numbers
| Tool | Price Range | Pad Width | Replaceable Head | Best For |
|---|---|---|---|---|
| Generic fixed-foam | $8–$15 | ~2 in. | No | Single-use jobs |
| Shur-Line 1000C | $22–$30 | ~2.5 in. | Yes | Fast repaints, long runs |
| Accubrush XT | $32–$45 | ~1.75 in. | Yes | Textured ceilings, precision |
| Hyde / Wooster Pro | $55–$90 | Varies | Yes | Multi-room commercial work |
The Variables That Determine Whether Your Edger Actually Works
Owning a good edger doesn’t guarantee a clean line. Reviewers who report poor results with the Accubrush XT or Shur-Line almost always trace the failure to one of three variables:
1. Paint consistency. Edger pads are calibrated for standard brush-and-roll viscosity. Thick paints — Farrow & Ball Estate Emulsion, Benjamin Moore Aura, and most high-end interior formulas — run at higher viscosity than commodity paint. Owner reports on home renovation forums (cited in The Spruce’s edger how-to) suggest thinning by no more than 5–10% with clean water, just enough to let the pad release cleanly without flooding the guide wheel. Don’t thin more than that or you’ll lose coverage.
2. Load amount. The most common edger mistake is overloading the pad. You want the pad surface misted with paint — not saturated. Load by pressing the pad onto a paint tray screen, not by dunking. A lightly loaded pad drags and deposits; a saturated pad floods and bleeds under the guide wheel.
3. Speed and pressure. Edgers work at a medium, deliberate pace. Too fast and the guide wheel skips; too slow and the pad deposits a thick bead that gravity pulls down before it sets. Owners consistently report the learning curve is one wall — by the end of the first run, most people have found the right rhythm.
Here’s What to Buy
If you’re doing a single room or accent wall and want to try the format: The Shur-Line 1000C is the practical entry point. It’s available at every major home center, replacement heads are easy to find, and it’s returnable if the format doesn’t work for you.
If you’re mid-project on a multi-room renovation with a quality paint like Sherwin-Williams Emerald, Benjamin Moore Regal Select, or Clare: The Accubrush XT is worth the extra $10–$15 over the Shur-Line. The guide-wheel system handles the slight texture variation you’ll encounter room to room, and the narrower pad gives you more control at ceiling junctions.
If you’re specifying premium architectural finishes — Farrow & Ball, Fine Paints of Europe, or Portola Rooms limewash — and the edge quality has to be flawless: At this tier, the honest recommendation is to combine a good edger for long straight runs with a Purdy Clearcut or Wooster Silver Tip angled brush for all transitions and returns. The paint is too expensive to trust entirely to any single pad tool. Use the edger where it’s strongest, brush the rest.
If edger tools still feel uncertain to you: That instinct is not wrong. A 2.5-inch angled sash brush in the hands of someone who has practiced the cut-in stroke on a few rooms will outperform any pad tool. The edger is a legitimate shortcut for the right use case — not a replacement for developing brush control if this kind of work is part of your regular practice.
The bottom line: tape is slower and less reliable than either option. The edger gets you most of the way to tape-free clean lines with far less setup. Match the tool tier to your project scale, load it lightly, and the first wall will tell you everything you need to know.